
Launch room[]

Crawlspace out of the launch room
- There is access to a crawlspace to the right of the large part into this area. Push the nearby ladder over to it.
- Climb up, open the door, and crawl inside.
- Continue forward and drop down through the shaft ahead.
- The route back is a dead end, so continue forward through the winding crawlspace up to a door.
- Open the door and drop to the floor of the lab ahead.
ARK lab[]

ARK prototype plug
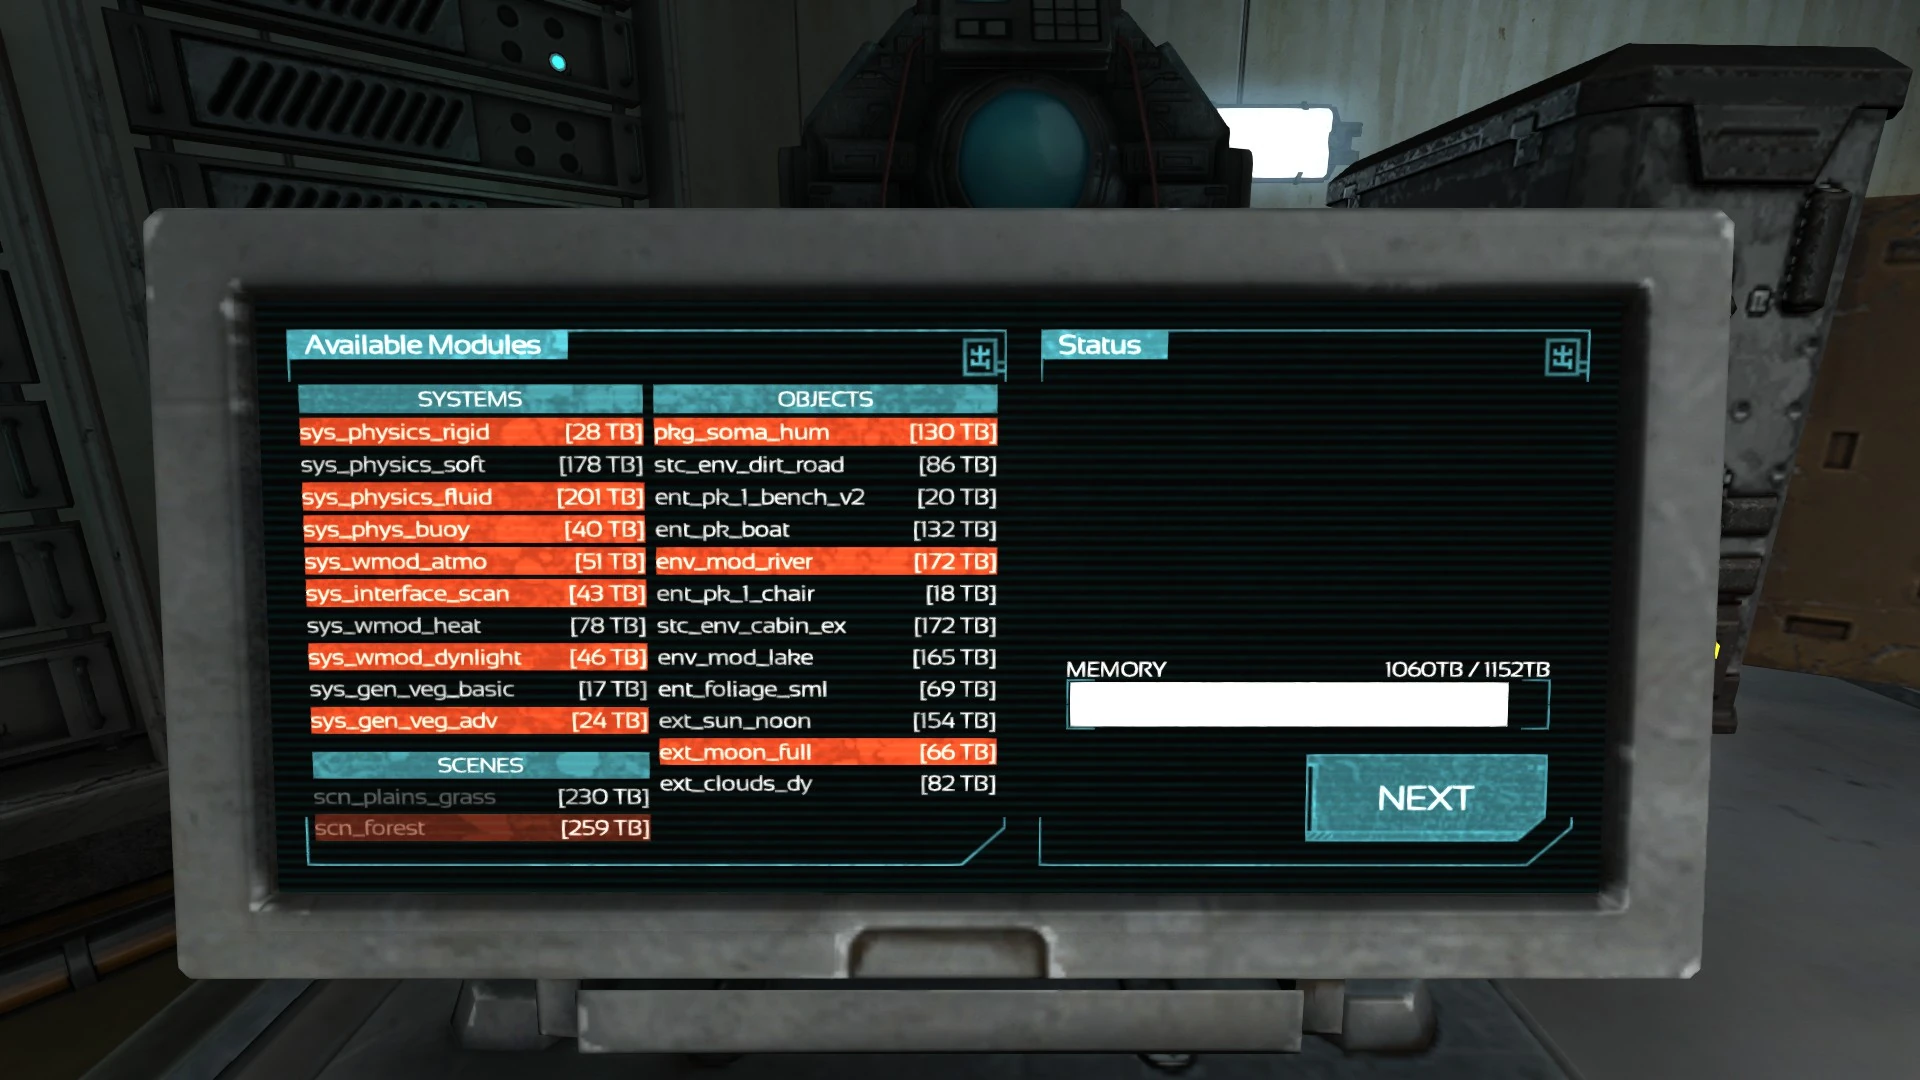
The minimum required modules loaded on the ARK prototype
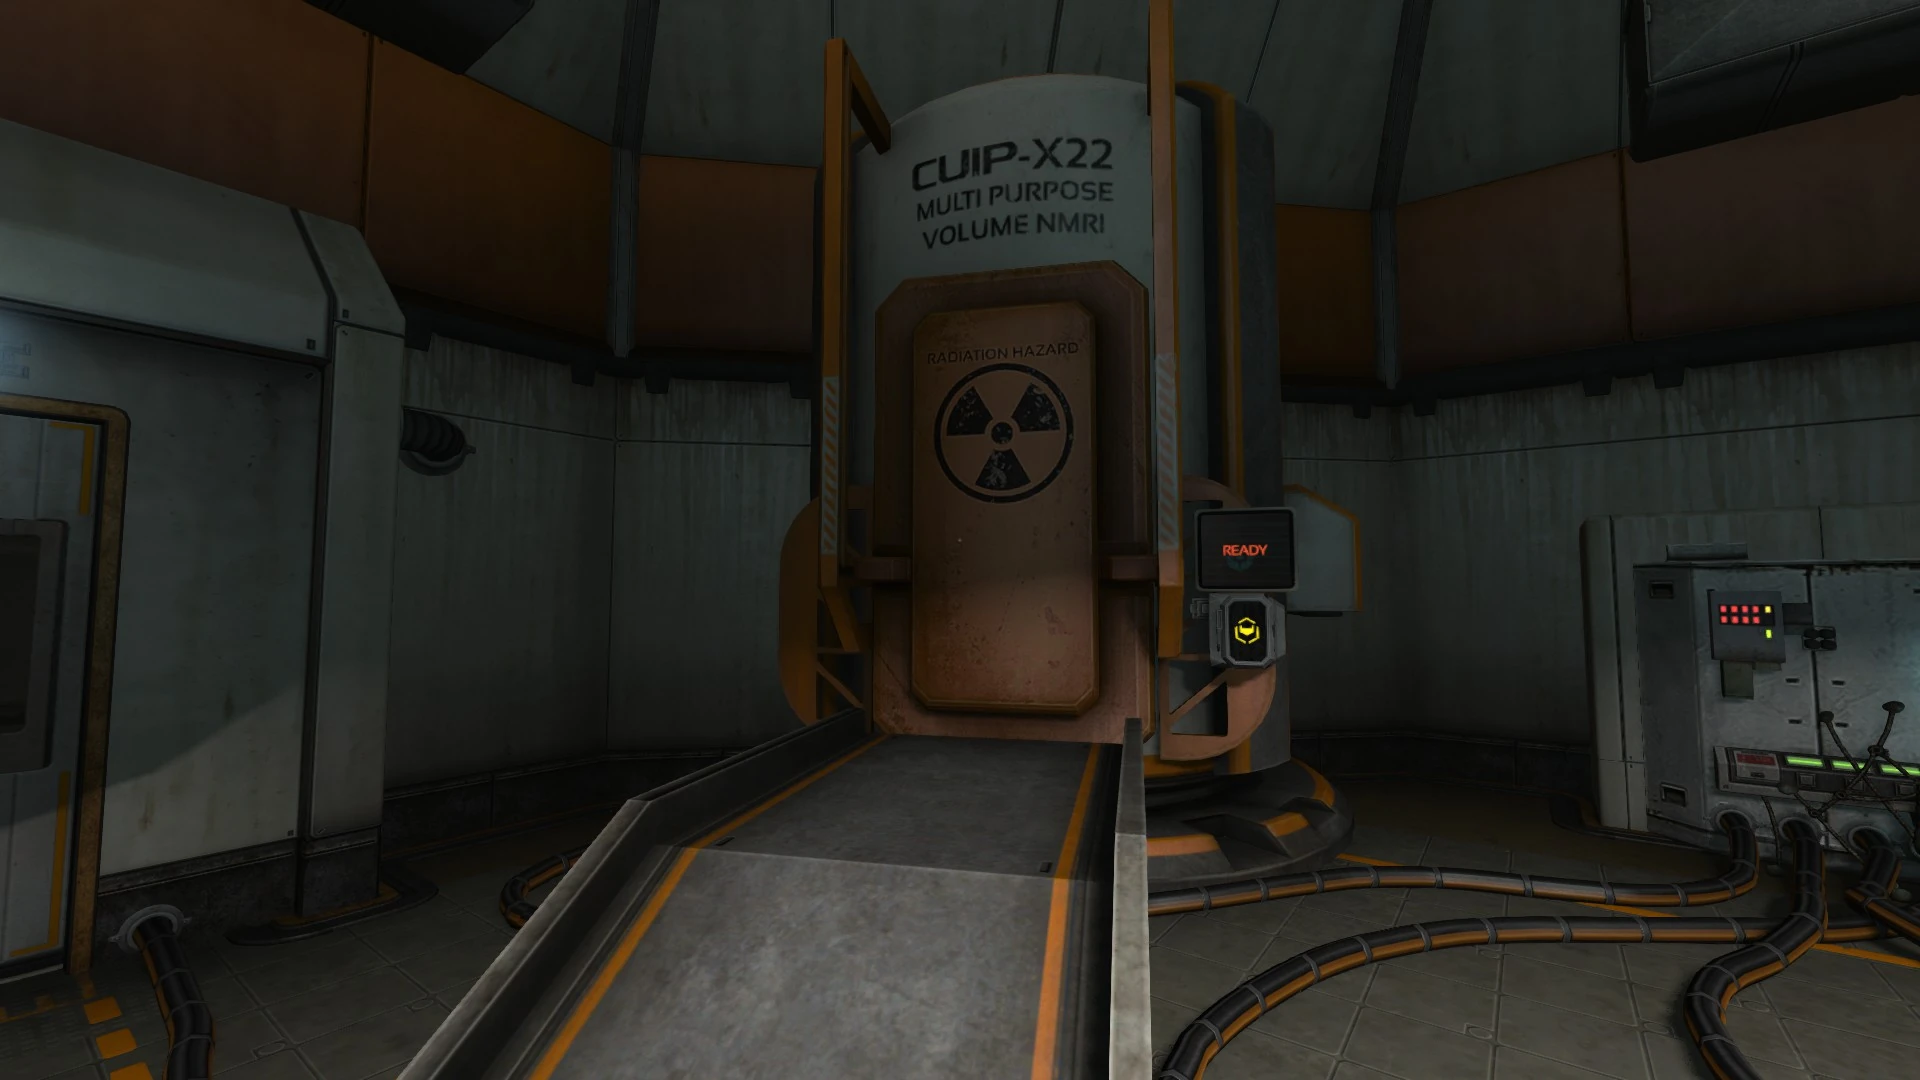
CUIP-X22 compound examiner
- It is a good idea to use the healing node just to the right.
- Walk over to the desk with the active computer screen. Optionally view the information on the computer and take the survey.
- Place the omnitool in this receptacle.
- After the conversation, turn to the left and plug in the prototype there.
- Walk around to the screen in front of the prototype. Press OK.
- It is now necessary to unload modules until the memory footprint is 1152 TB or less while still having the required modules loaded.
- Unloading all modules first makes solving this puzzle easier.
- There will now be lines like "sim_base REQ. type_soma" indicating what required modules are missing. There isn't a "type_soma" in the list, but if you hover over "pkg_soma_hum", the line will flash yellow. This indicates loading this module meets this requirement.
- The smallest possible loadout is 1060 TB requiring:
- sys_physics_rigid
- sys_physics_fluid
- sys_phys_buoy
- sys_wmod_atmo
- sys_interface_scan
- sys_wmod_dynlight
- sys_gen_veg_adv
- pkg_soma_hum
- env_mod_river
- ext_moon_full
- Hit "Next" when a valid configuration is set up.
- Select "DUMMY" and then "UPLOAD". Note that the other scans are incompatible.
- Once it's loaded, select "Start Simulation".
- Reducing the "RESOURCE ALLOC." makes the next step much easier. It can be reduced to as little as 3%.
- Wait for "DUMMY" to appear under "LOADED MODULE" and then select "Pause Simulation" and "Run Diagnostics"
- Leave the computer screen after the conservation. Approach the CUIP-X22 chamber on the other side of the room.
- When asked, open the chamber, get inside, and hit the switch in the back.
- When this finishes, walk back over and retrieve the omnitool.
- The door to the back is dead and can't be used, so use the omnitool to open the door to the right. Head inside and wait for the scan.
To the casing room[]

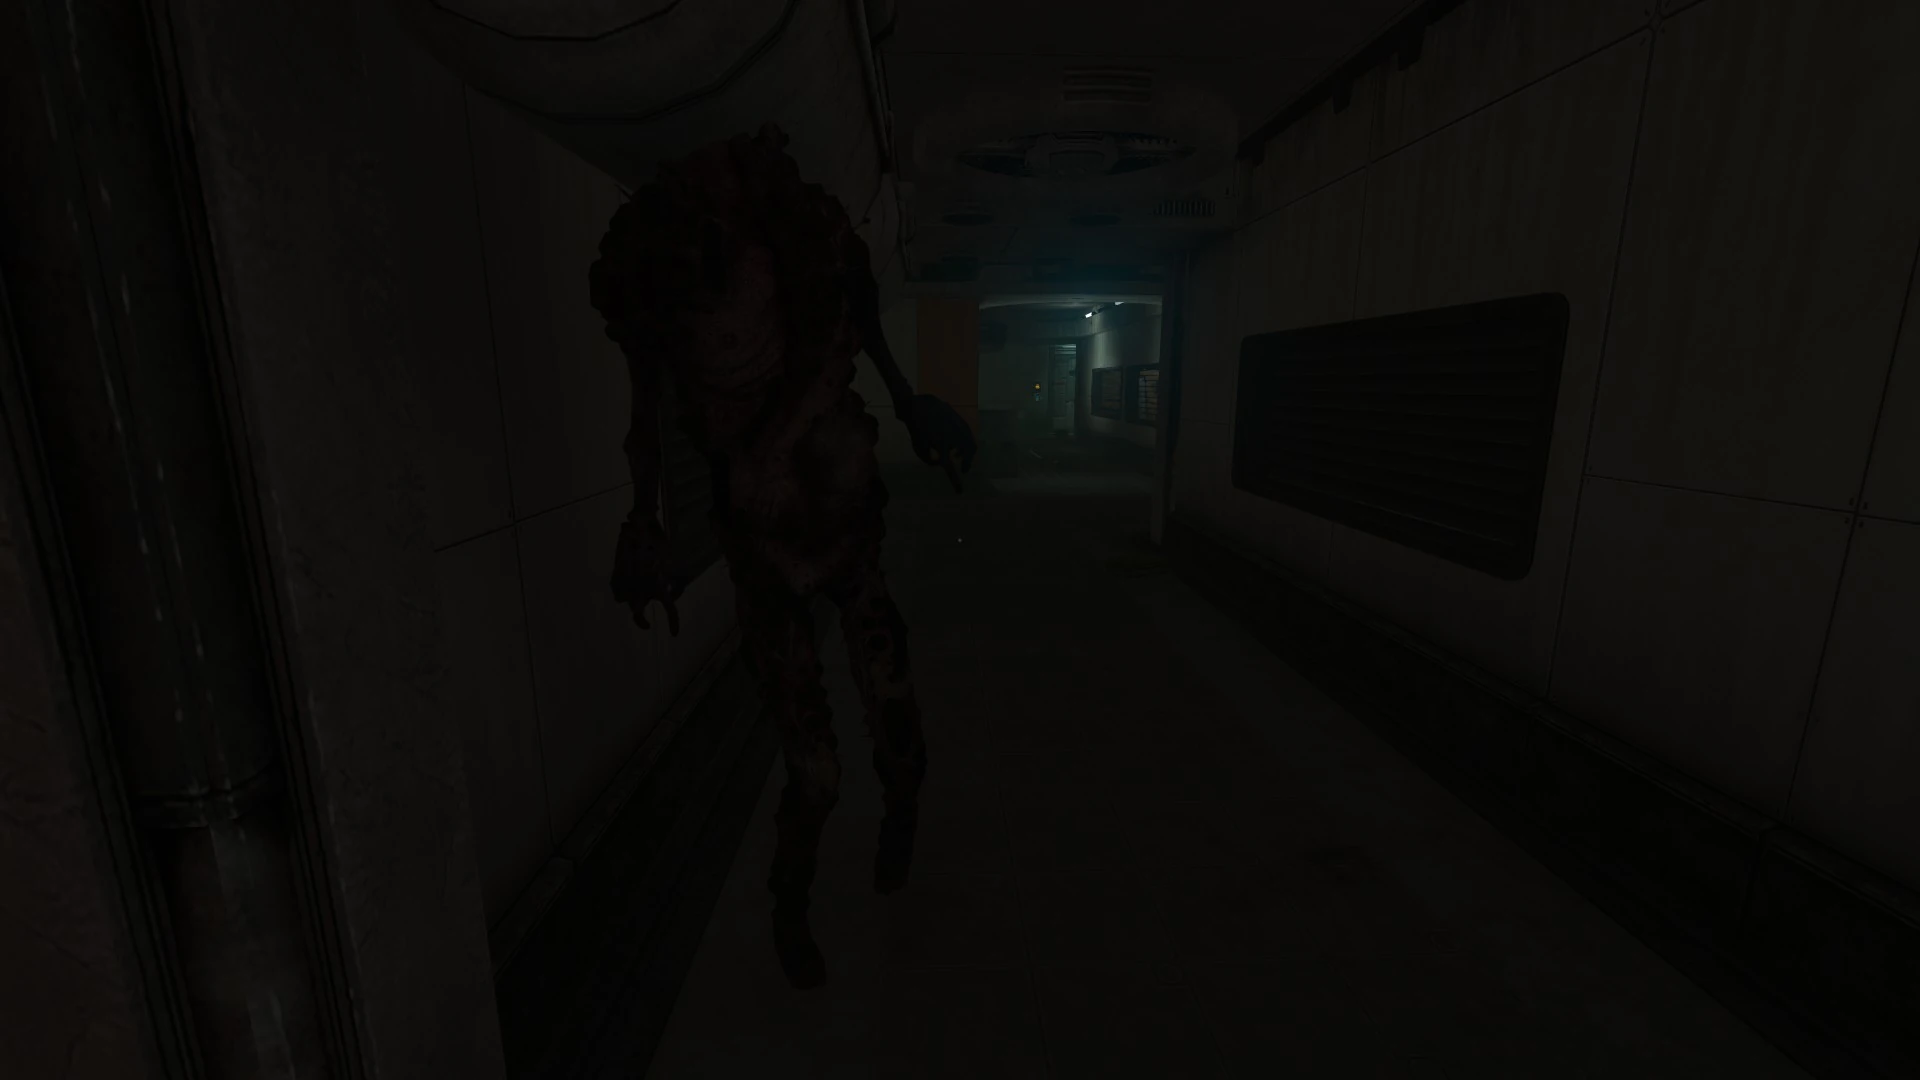
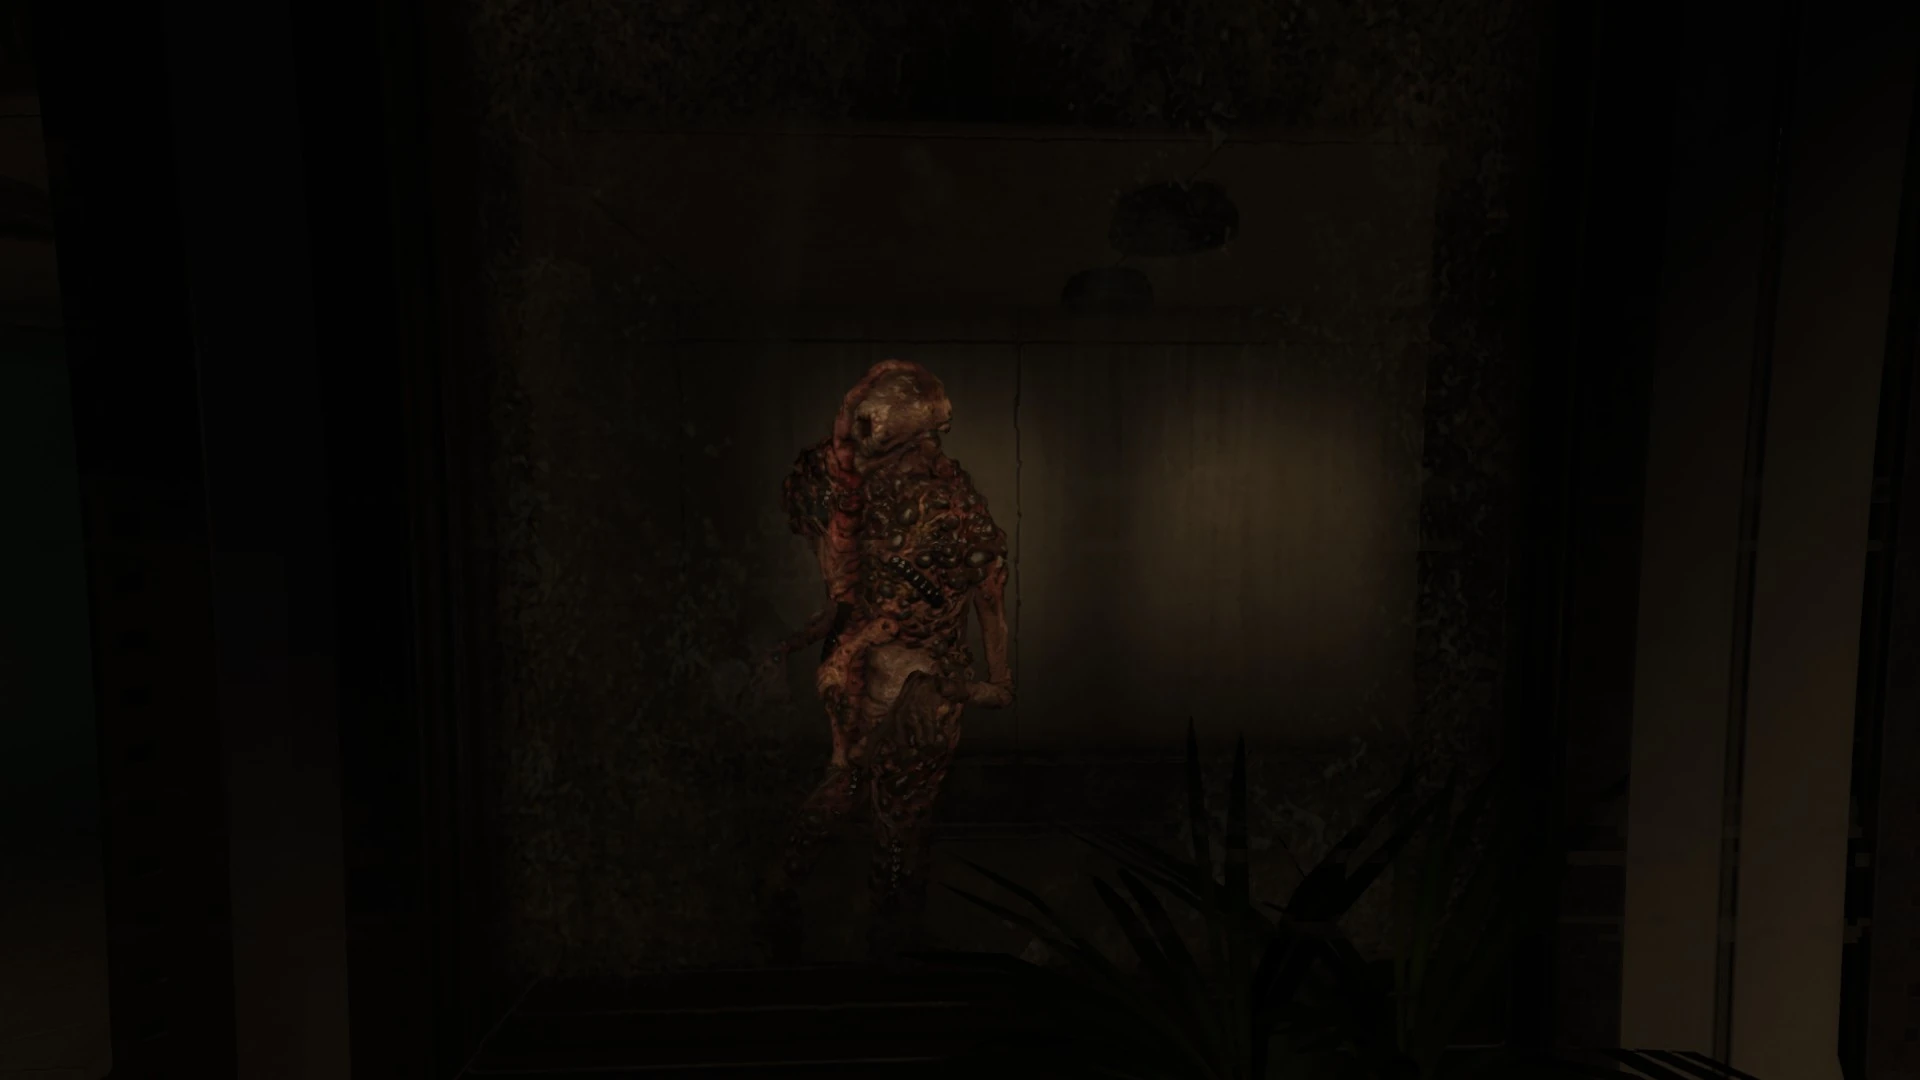
Monster encountered in the corridors of the Theta laboratory area
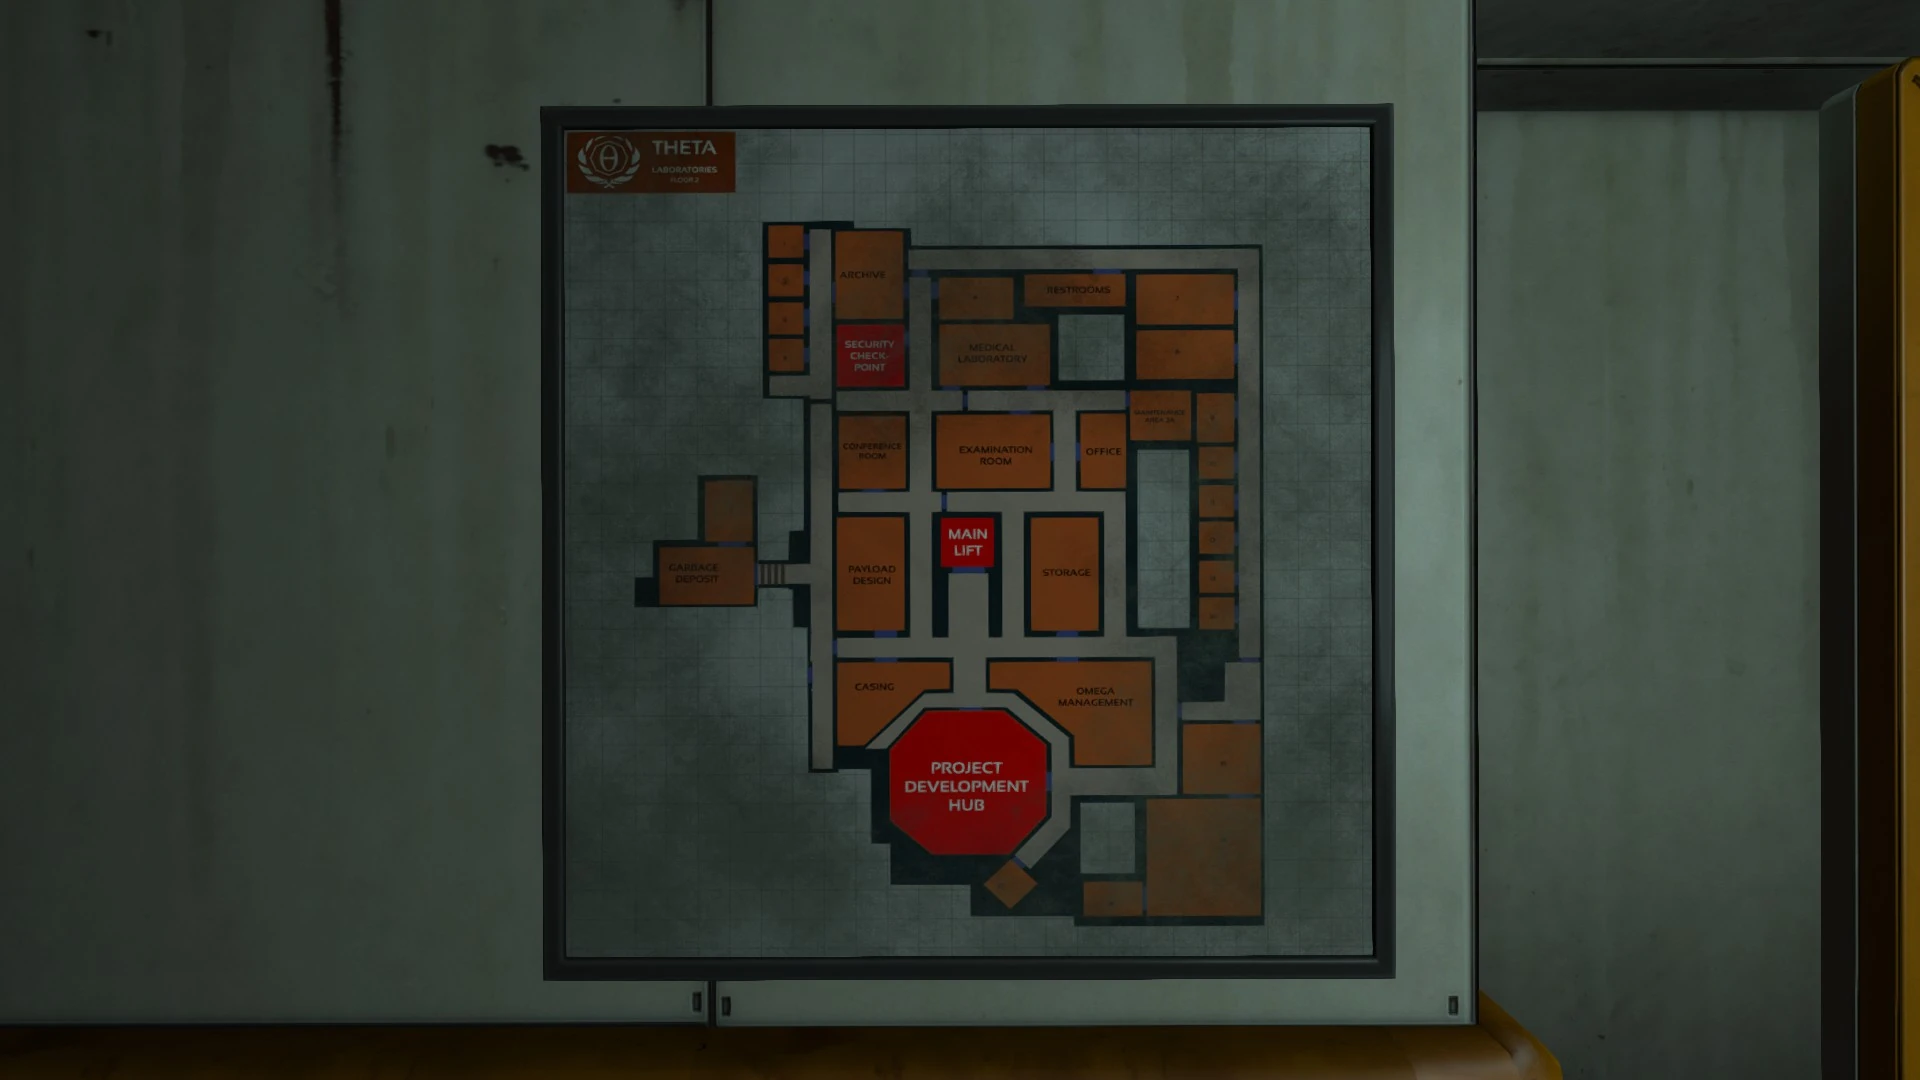
Map of the Theta laboratory area

Monster outside the security checkpoint
Warning: There is a new monster that patrols the halls and rooms of this next area. It doesn't appear to be in the area at all times; it is even possible to sprint around the halls and rooms for long periods without encountering it. Judging by sounds in the area, it may spend a lot of time in crawlspaces inaccessible to Simon. Certain actions seem to draw it out, so stay on the alert. Simon appears to be able to survive a hit or two from this monster.
It usually doesn't attack immediately on sighting Simon, however, and the simplest way to deal with it in most cases is simply to calmly walk away and out of the general area without getting close. Don't sprint away from it, stay in its sight for a long time, or get close in while in front of it. These all seem to antagonize it into charging and attacking. Keep in mind that it does enter many of the rooms, and only a few have any good places to hide. It is best to delay exploration until the management room is accessible as it is the only guaranteed safe room in the area. The monster doesn't seem to understand how to get in there, so when in doubt, retreat there.
- Head forward to the intersection ahead and turn left.
- Go to the first door on the right, open the door, and go into the casing room.
- Optionally listen to the data buffer on the intercom.
- Head to the back corner of the room. There is a white cylindrical object lying on its side on the second shelf on the right.
- Grab this and keep a hold on it.
To the Omega management room[]
- Take it back into the corridor, turn right, and proceed straight through the intersection ahead.
- Keep going past the door to the right to the cracked window on the same side.
- Do this part quickly, as it will draw the attention of the monster. Throw the cylinder into the window a couple of times to break it. Jump up, crouch, enter the management room, and hide.
- Go to the corpse in the chair. Take the connector chip from his hand. Optionally listen to a message from the body.
To the security checkpoint[]
Warning: If they haven't already, the lights will likely go out in the halls after opening the door to the security checkpoint. This makes the monster much harder to see. If desired, it's best to complete any optional exploration of the other rooms now. Just avoid the security checkpoint while exploring, then head there when ready to continue.
Warning: Using either of the healing nodes in the area appears to draw the attention of the creature.
- If still at the management office, go back to the door to the casing room, but instead of going inside, turn right. Proceed straight ahead through all intersections to the end to find the security checkpoint.
- Getting close to the security office seems to draw the creature. Open the door, go inside, and crouch down behind the desk.
- The monster should leave, but it will come back frequently. It should not notice Simon as long as he is crouched behind the desk even if it enters the room.
- Place the connector chip in the receptacle to the right of the computer.
- Turn to the computer screen and press "OK".
- Select "Key Control" and then "Update Connector Chip."
- Retrieve the connector chip.
To the main lift[]

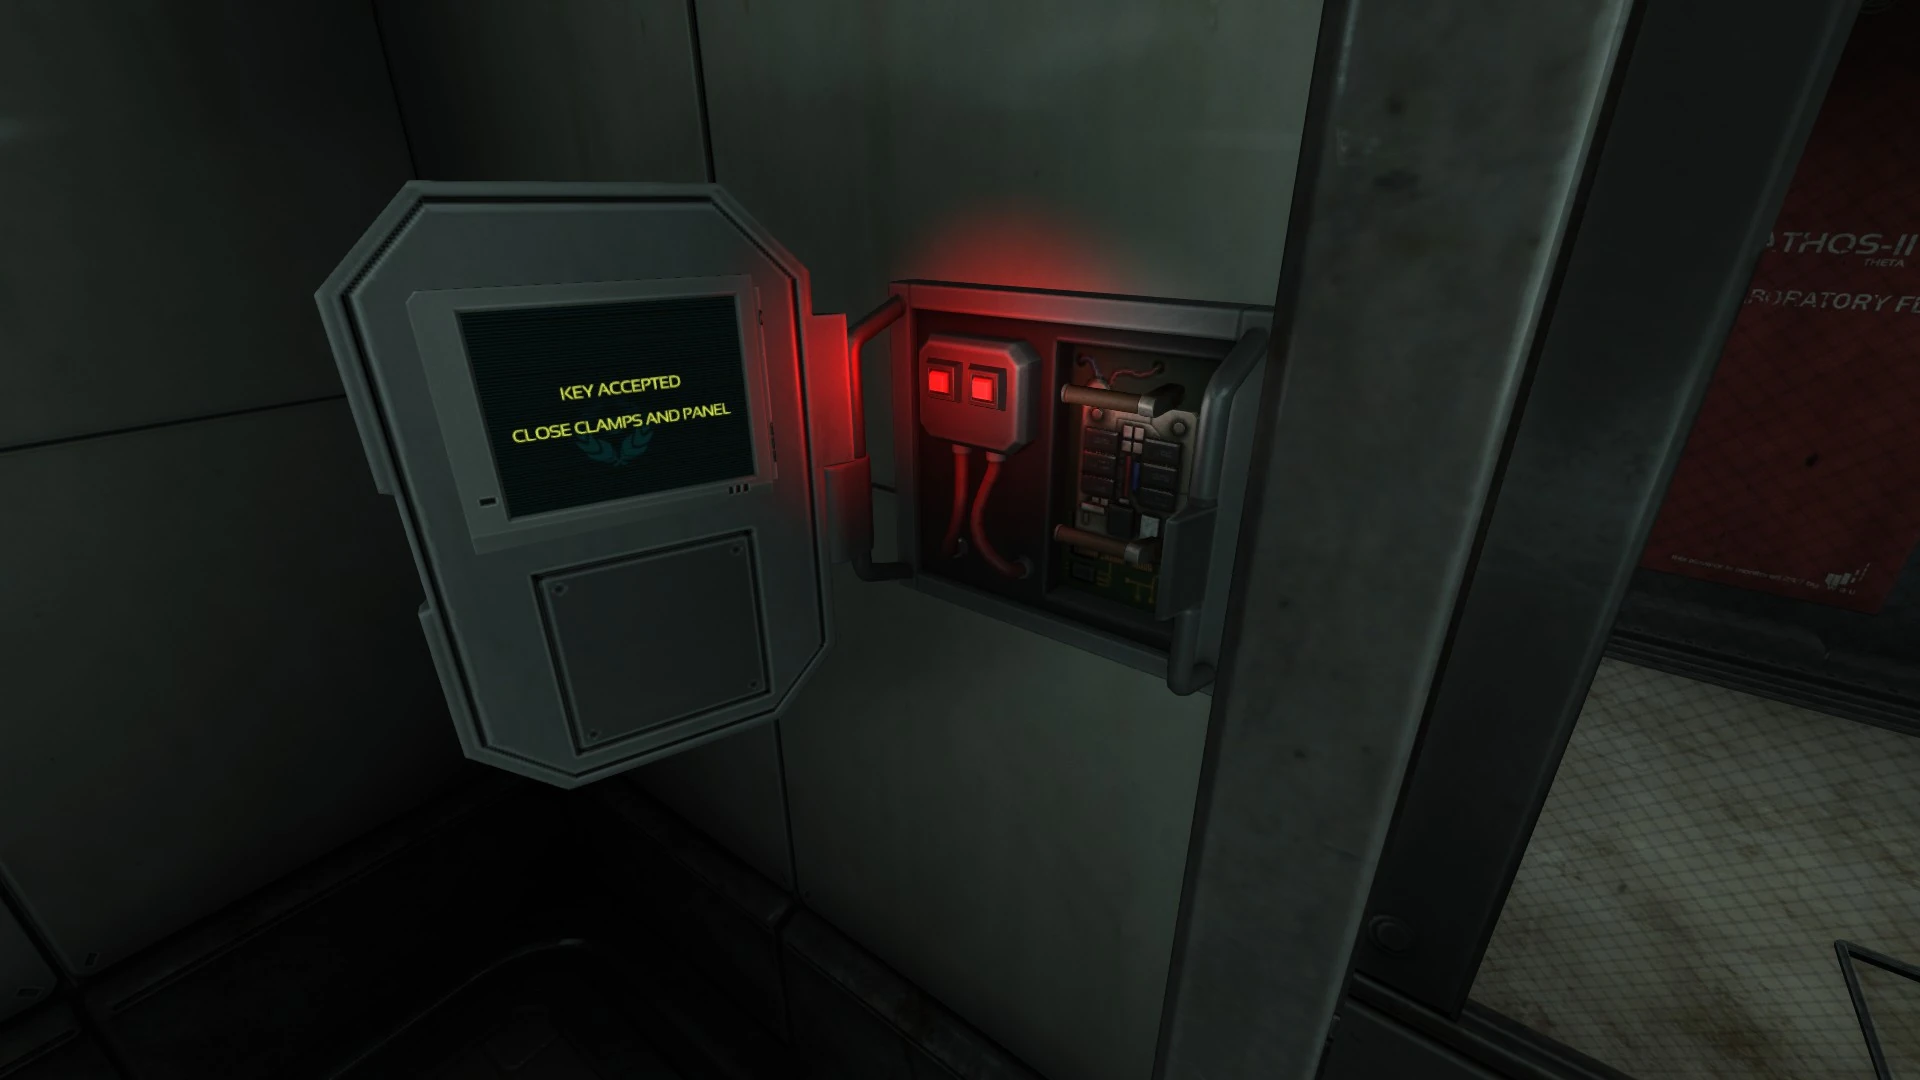
Installing the connector chip at the main lift
- Unfortunately, the monster doesn't tend to wander far now. When it's clear, sneak back to the casing room door.
- If the creature isn't nearby, take a right, and then the next right to the lift.
- If it's anywhere nearby, it may be better to head to the management room and wait it out. It's best if it heads to the right of the management room and down the side corridor The elevator corridor is a dead end and the next steps do take a few moments. From the broken window, the lift is to the left, past two intersections, and to the left at the third.
- At this point, work quickly.
- Place the connector chip in the panel.
- Close the two clamps, above and below, over the chip.
- Close the panel.
- Hit the button now active on the panel.
- Go inside the elevator.
- Select "Transport St." or "Maintenance". It doesn't matter which.
Into the shaft[]
- After the elevator stops, open the panel in the floor.
- Climb down the ladder.
- After the fall, climb up the ladder and through the open door.
Maintenance level[]
Monster in the Theta maintenance level
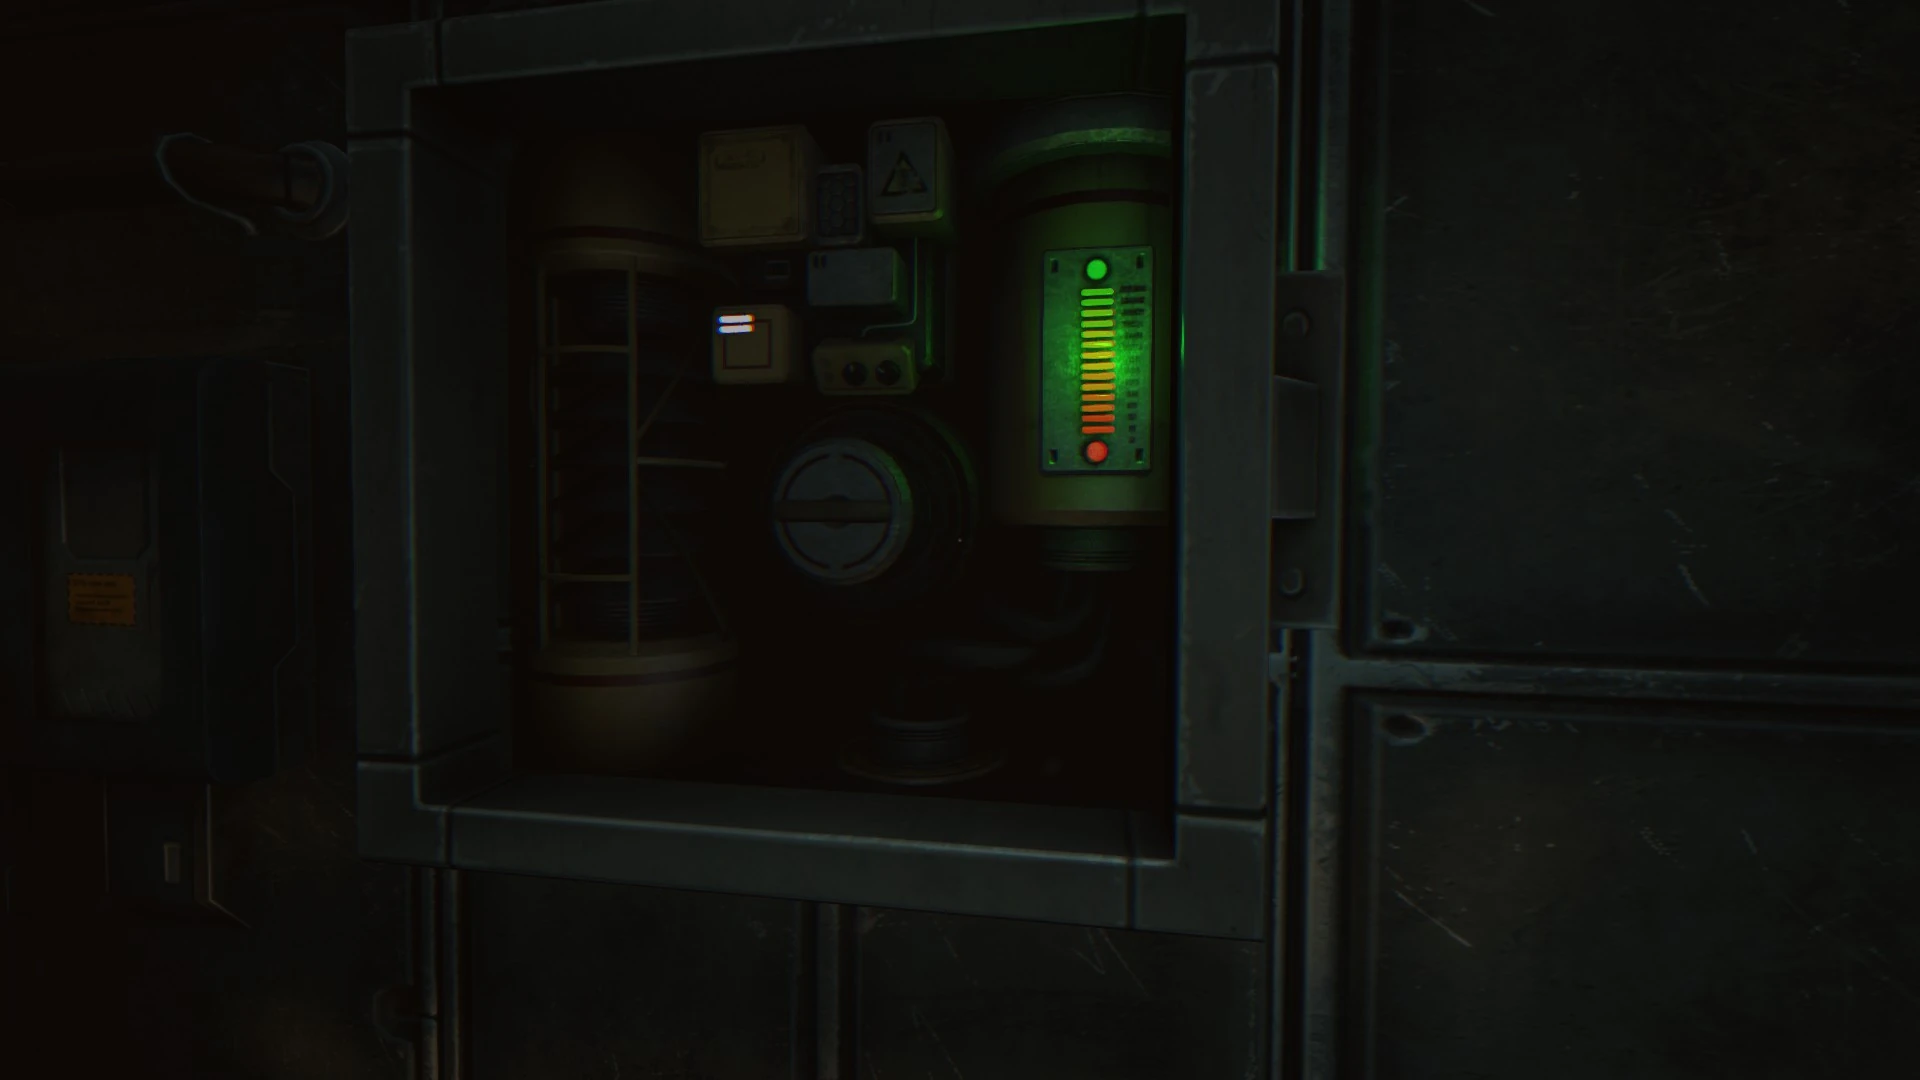
Charging the service battery


A drop off the ledge ahead leads to safety
- Take the door ahead to the left. Currently, there is nothing of interest straight ahead.
- Go through the corridor here. Taking the hit here appears to be unavoidable.
- Struggle out of the gunk after the scene. Turn right and proceed ahead. Use the door ahead to the left.
Warning: the monster from the server access room in Theta, or another like it, is in the room ahead. It still seems to be pretty limited in its ability to detect Simon while he's crouched. They don't appear to be able to get into crawlspaces, either, making these safe places to hide.
- Head through the short corridor.
- It's possible to make a circle around this room to sneak around the monster, and the small room to the left provides a good hiding spot.
- Get to the other side of the room and go through the door that should already be open. This is best done when the monster is still in the room, but has left the path clear. Otherwise, there is a risk it will be in the corridor ahead with no route around it.
- Go through the corridor into the next room.
- Use the healing node if desired, but be fast. The monster's patrol does include this room.
- Open the door to the crawlspace and go inside.
Warning: Another one of them will be patrolling on this side of the crawlspace as well.
- Crawl through the short space and open the door.
- If the creature isn't in the room yet, proceed into the room and open the door off to the left.
- Don't go through yet. The monster is likely in the corridor ahead, and there's no way around it there. Hide near the crawlspace or inside it and wait for the monster to enter.
- Slip around it and then continue through the corridor on the other side of the door to the next room.
- To the right, there will be a door to another crawlspace. Open it and get inside.
- Continue through the crawlspace to the next door.
Warning: In this particular location, vision distortion occurs even when there isn't a monster around. Unfortunately, there is one patrolling this area which may come into this room, so it is necessary to be extra careful around this spot. Remember that crawlspaces are safe.
- Go into the next room and open the door.
- While this room looks like a good spot to slip around the monster, it doesn't generally come in far enough to allow it. Instead, wait until the path to the door is clear and then sneak up there.
- Watch the monster. It will turn in an intersection, leaving its back facing the corridor. There is enough time to sneak straight through this corridor to the next room if the timing isn't too bad.
- Continue forward and then keep going right to an electrical panel on the left wall. Remain wary and be ready to hide if necessary.
- Take the cover off the electrical panel. Pump the handle until there is a full charge on the gauge to the right.
- At this point, either wait for the creature to enter this room and slip around it, or if it is heading away from the room, wait until the intersection in the corridor outside can be safely reached. Either way, get to that intersection and take the right.
- Open the security door there. Continue through and walk off the edge, falling into the water.
After taking the plunge[]


The drop down to the tunnel out of Theta
- It is now safe for the time being.
- Go to the ladder to the right. Climb it to the top.
- Follow the grating around to the other side of the column.
- Turn right. From the grating there, use the ladder at the other side.
- From the top of that ladder, follow the grating around to the wall.
- Use the ladder going down to the left.
- Look down and to the right. Jump over to the grating below.
- Remove the grating from in front of the tunnel.
- Head down the tunnel and take a left at the intersection.
- Use the healing node if desired.
- Pull the emergency flush lever.
- Turn around, go back into the tunnel, and head straight through the intersection.
| Game walkthrough |
|---|
|
Theta (second part)
|